In today’s digital landscape, online privacy and account management have become critical. Whether you’re managing multiple social media accounts, performing automated web tasks, or simply aiming to maintain anonymity online, using a proxy with DICloak is a practical solution.
QuarkIP, as a trusted proxy service provider, simplifies the process of setting up DICloak proxies, giving you reliable connections and seamless performance. In this guide, we’ll walk you through everything you need to know to integrate QuarkIP proxies into your DICloak workflow.
Why Use a Proxy With DICloak?
Before diving into setup, it’s important to understand the benefits:
- Enhanced Privacy: Your real IP address remains hidden, ensuring anonymity.
- Multi-Account Management: Run multiple accounts without risk of IP bans.
- Geo-Spoofing Capabilities: Access content restricted to specific regions.
- Improved Security: Avoid tracking and reduce exposure to malicious websites.
Using QuarkIP ensures high-quality proxies with minimal downtime, optimized for DICloak.
Choosing the Right QuarkIP Proxy
QuarkIP provides multiple proxy types suitable for different use cases:
- Residential Proxies: Ideal for social media and general browsing.
- Datacenter Proxies: Perfect for speed-intensive tasks.
- IPv6 Proxies: Suitable for bulk operations or automation scripts.
Consider your use case when selecting your proxy type. For DICloak, residential or datacenter proxies are usually recommended depending on your automation needs.
Step-by-Step Setup: DICloak Proxy With QuarkIP
Need help or want to stay updated on new features?
Join Dicloak’s official Telegram channel: https://t.me/DICloakBrowser_Official.
You’ll also find special deals and limited-time promo codes shared there from time to time.
Below is a structured section where you can insert detailed instructions, screenshots, and configurations.
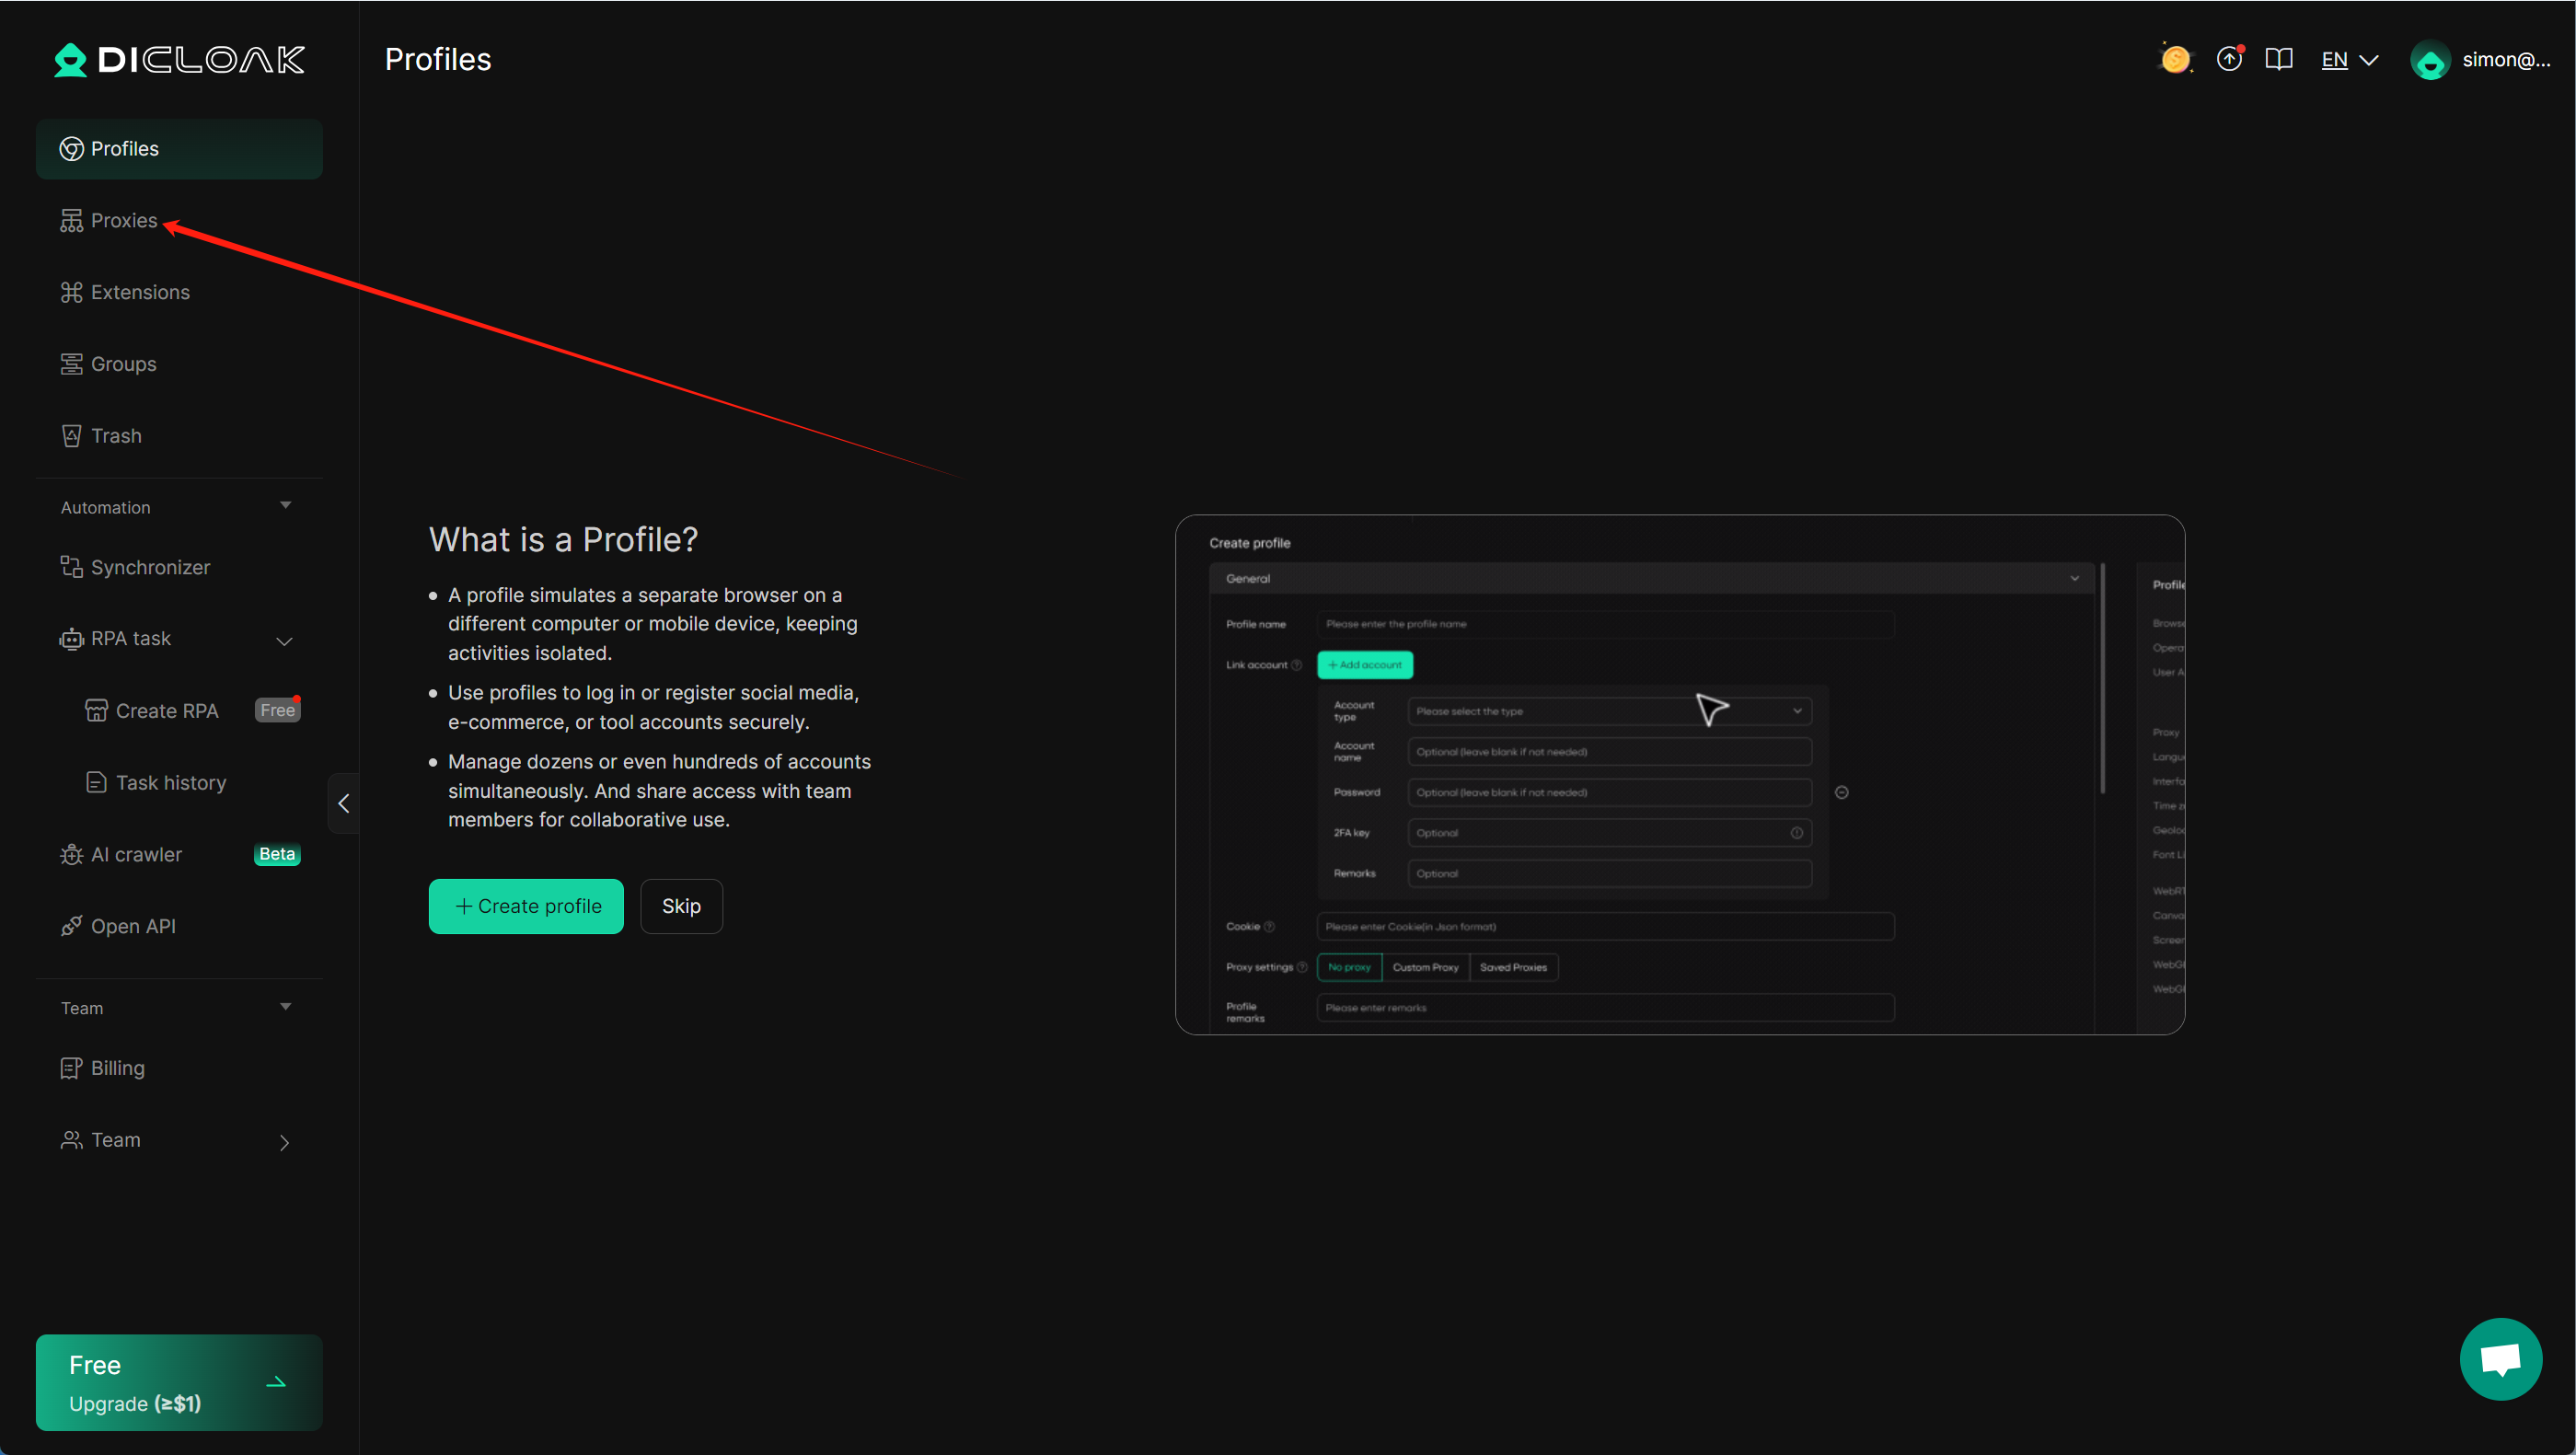
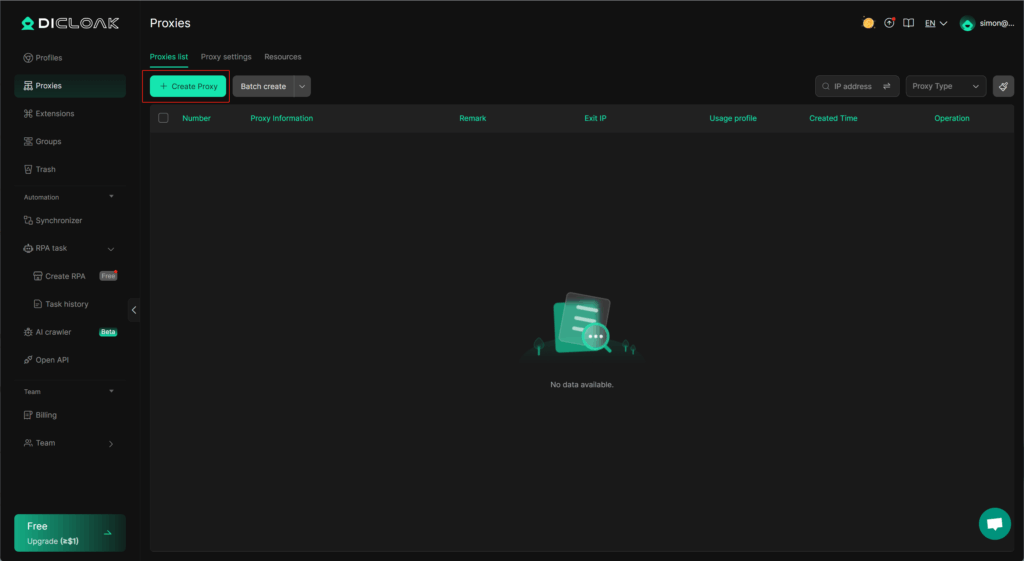
1.Navigate to “Proxy Management” and import the proxies from QuarkIP into DICloak.
2.Click the “Create Proxy” button.
3.1.Static Proxies
Using QuarkIP’s United States ISP proxies as an example, enter the corresponding proxy information into DICloak based on the provided labels.
- After purchasing a proxy, it takes 2-3 minutes for the allocation to complete. During this time, we verify the payment status and assign the proxy. The proxy status will show as ‘Allocating’ while this process is underway
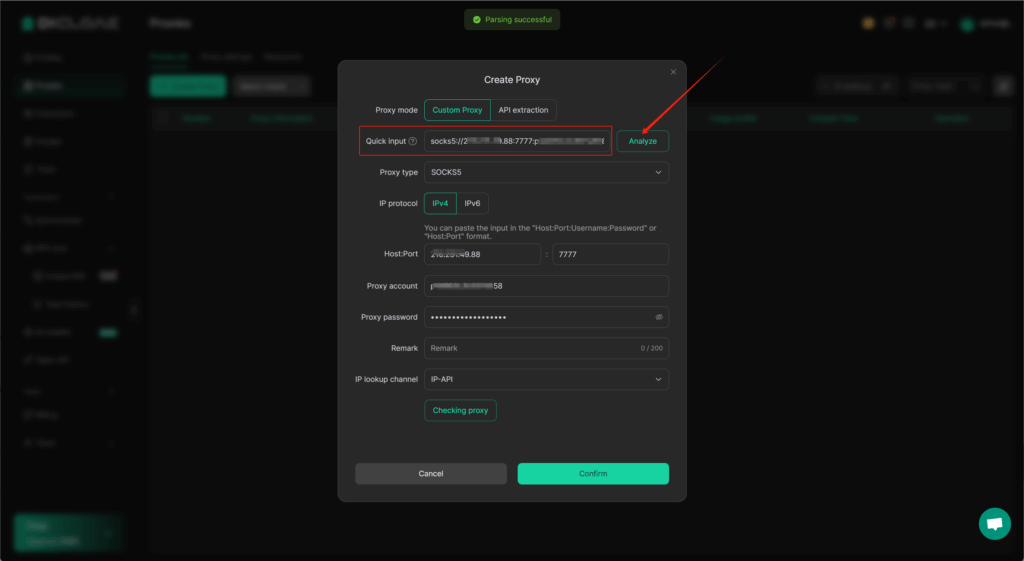
- Unlike other proxy products, you can freely select HTTP or Socks5 protocols without having to change the port number.
How do I purchase QuarkIP ISP proxies?

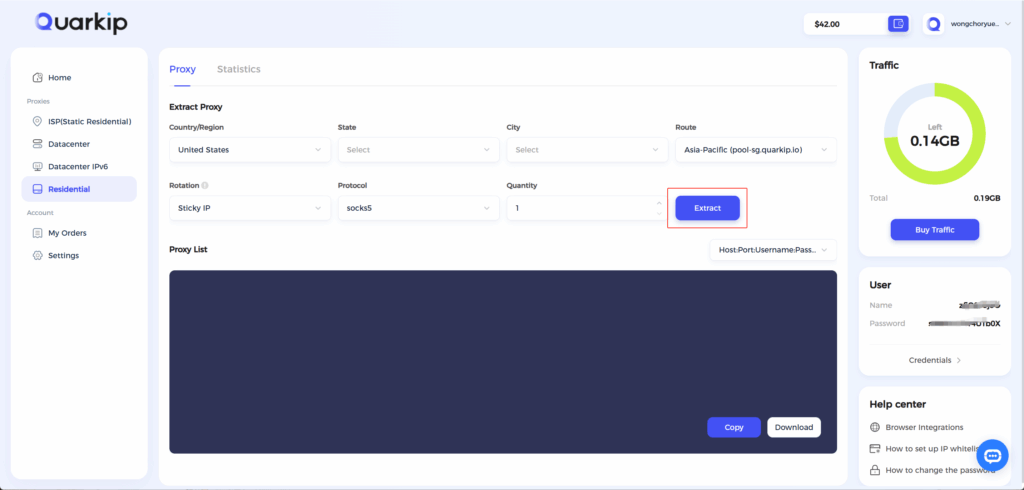
3.2.Residential Proxies
Once traffic allocation is complete, select your desired region and configure other settings, then click the ‘Extract’ button
- Country/Region:Select the proxy’s country. Choose “Global Mix” for random international rotation
- State (Optional):The proxy’s state/province. Leave blank for random rotation within the selected country
- City (Optional):The proxy’s city. Omit for broader location selection
- Route:Automatically selects optimal routes based on your region
- Rotation
- Sticky IP: Maintains the same IP for ~30 minutes
- Randomize IP: Changes IP with every request Choose based on your use case
- Protocol:Supports both SOCKS5 and HTTP
- Quantity:Select multiple proxies only if needed (e.g., for configuring multiple browser profiles). Otherwise, 1 is sufficient
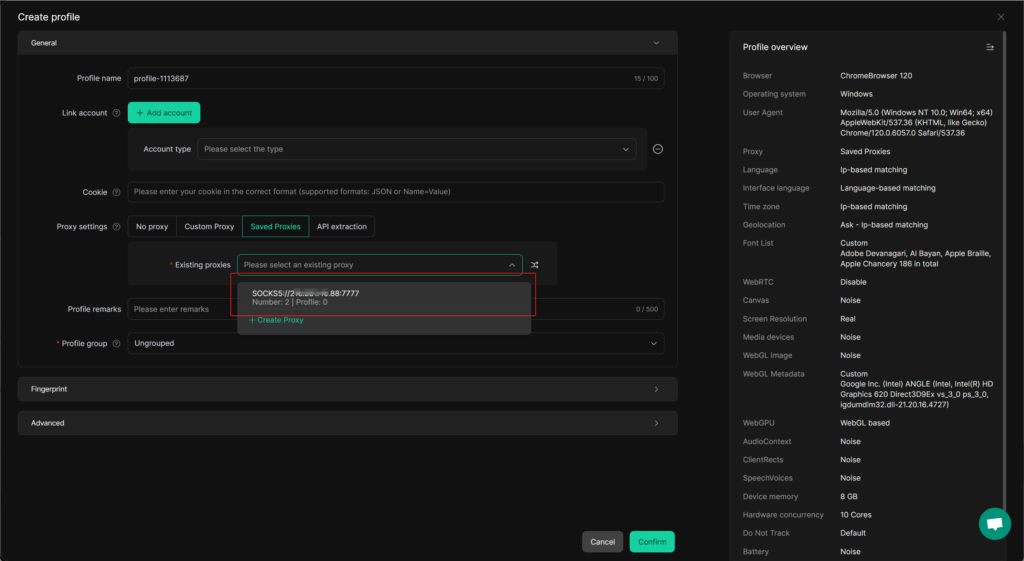
4.Once the proxy is verified, proceed to create a new browser profile; select the newly added QuarkIP proxy from the “Existing Proxies” list, complete the setup, and save to start using it.
Note: Each field is separated by a colon (:). The account credential should be entered as a complete string – be sure to include all trailing parameters during import.
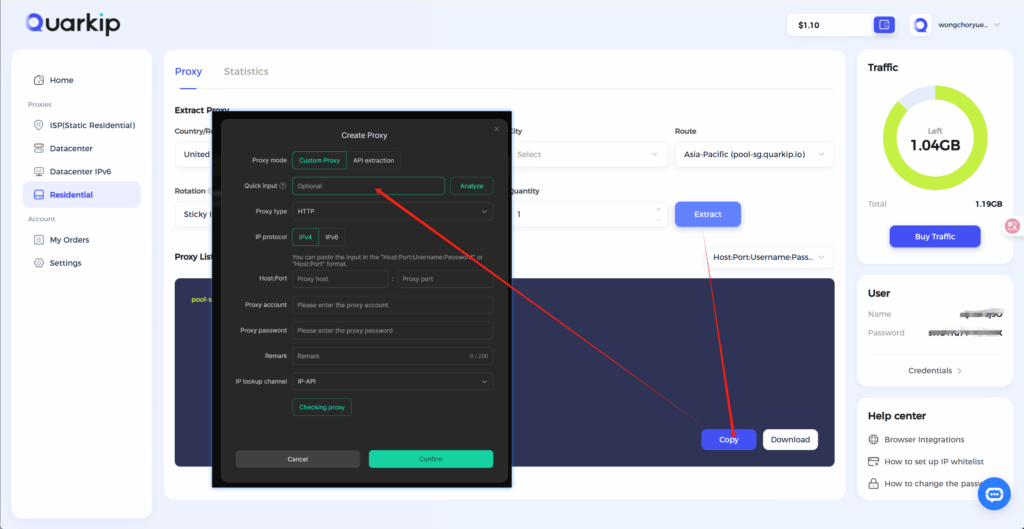
Copy the generated information into the input box, and make sure the protocols match,click the ‘’Analyze‘’ button
You can expand this with screenshots and any troubleshooting tips for your readers.
Tips for Optimizing Your DICloak Proxy Experience
- Test Your Proxy: Always verify your proxy is working before running automation tasks.
- Rotate Proxies Regularly: Avoid IP blocks by rotating proxies periodically.
- Match Proxy Type to Task: Use residential proxies for social media and datacenter proxies for scraping tasks.
- Monitor Performance: Keep an eye on speed and reliability to ensure smooth operations.
Common Issues and How to Solve Them
- Connection Refused or Failed: Ensure your proxy credentials are correct and check firewall settings.
- Slow Performance: Switch to a closer proxy location or a higher-tier plan.
- IP Bans: Rotate proxies or use different proxy types to avoid detection.
Conclusion
Setting up a DICloak proxy with QuarkIP is straightforward once you understand your proxy needs and DICloak’s configuration. By following this guide and integrating high-quality QuarkIP proxies, you can enhance privacy, manage multiple accounts efficiently, and perform web automation tasks without interruptions.
For more tips on proxy optimization and account management, stay tuned to our blog for the latest updates and tutorials.