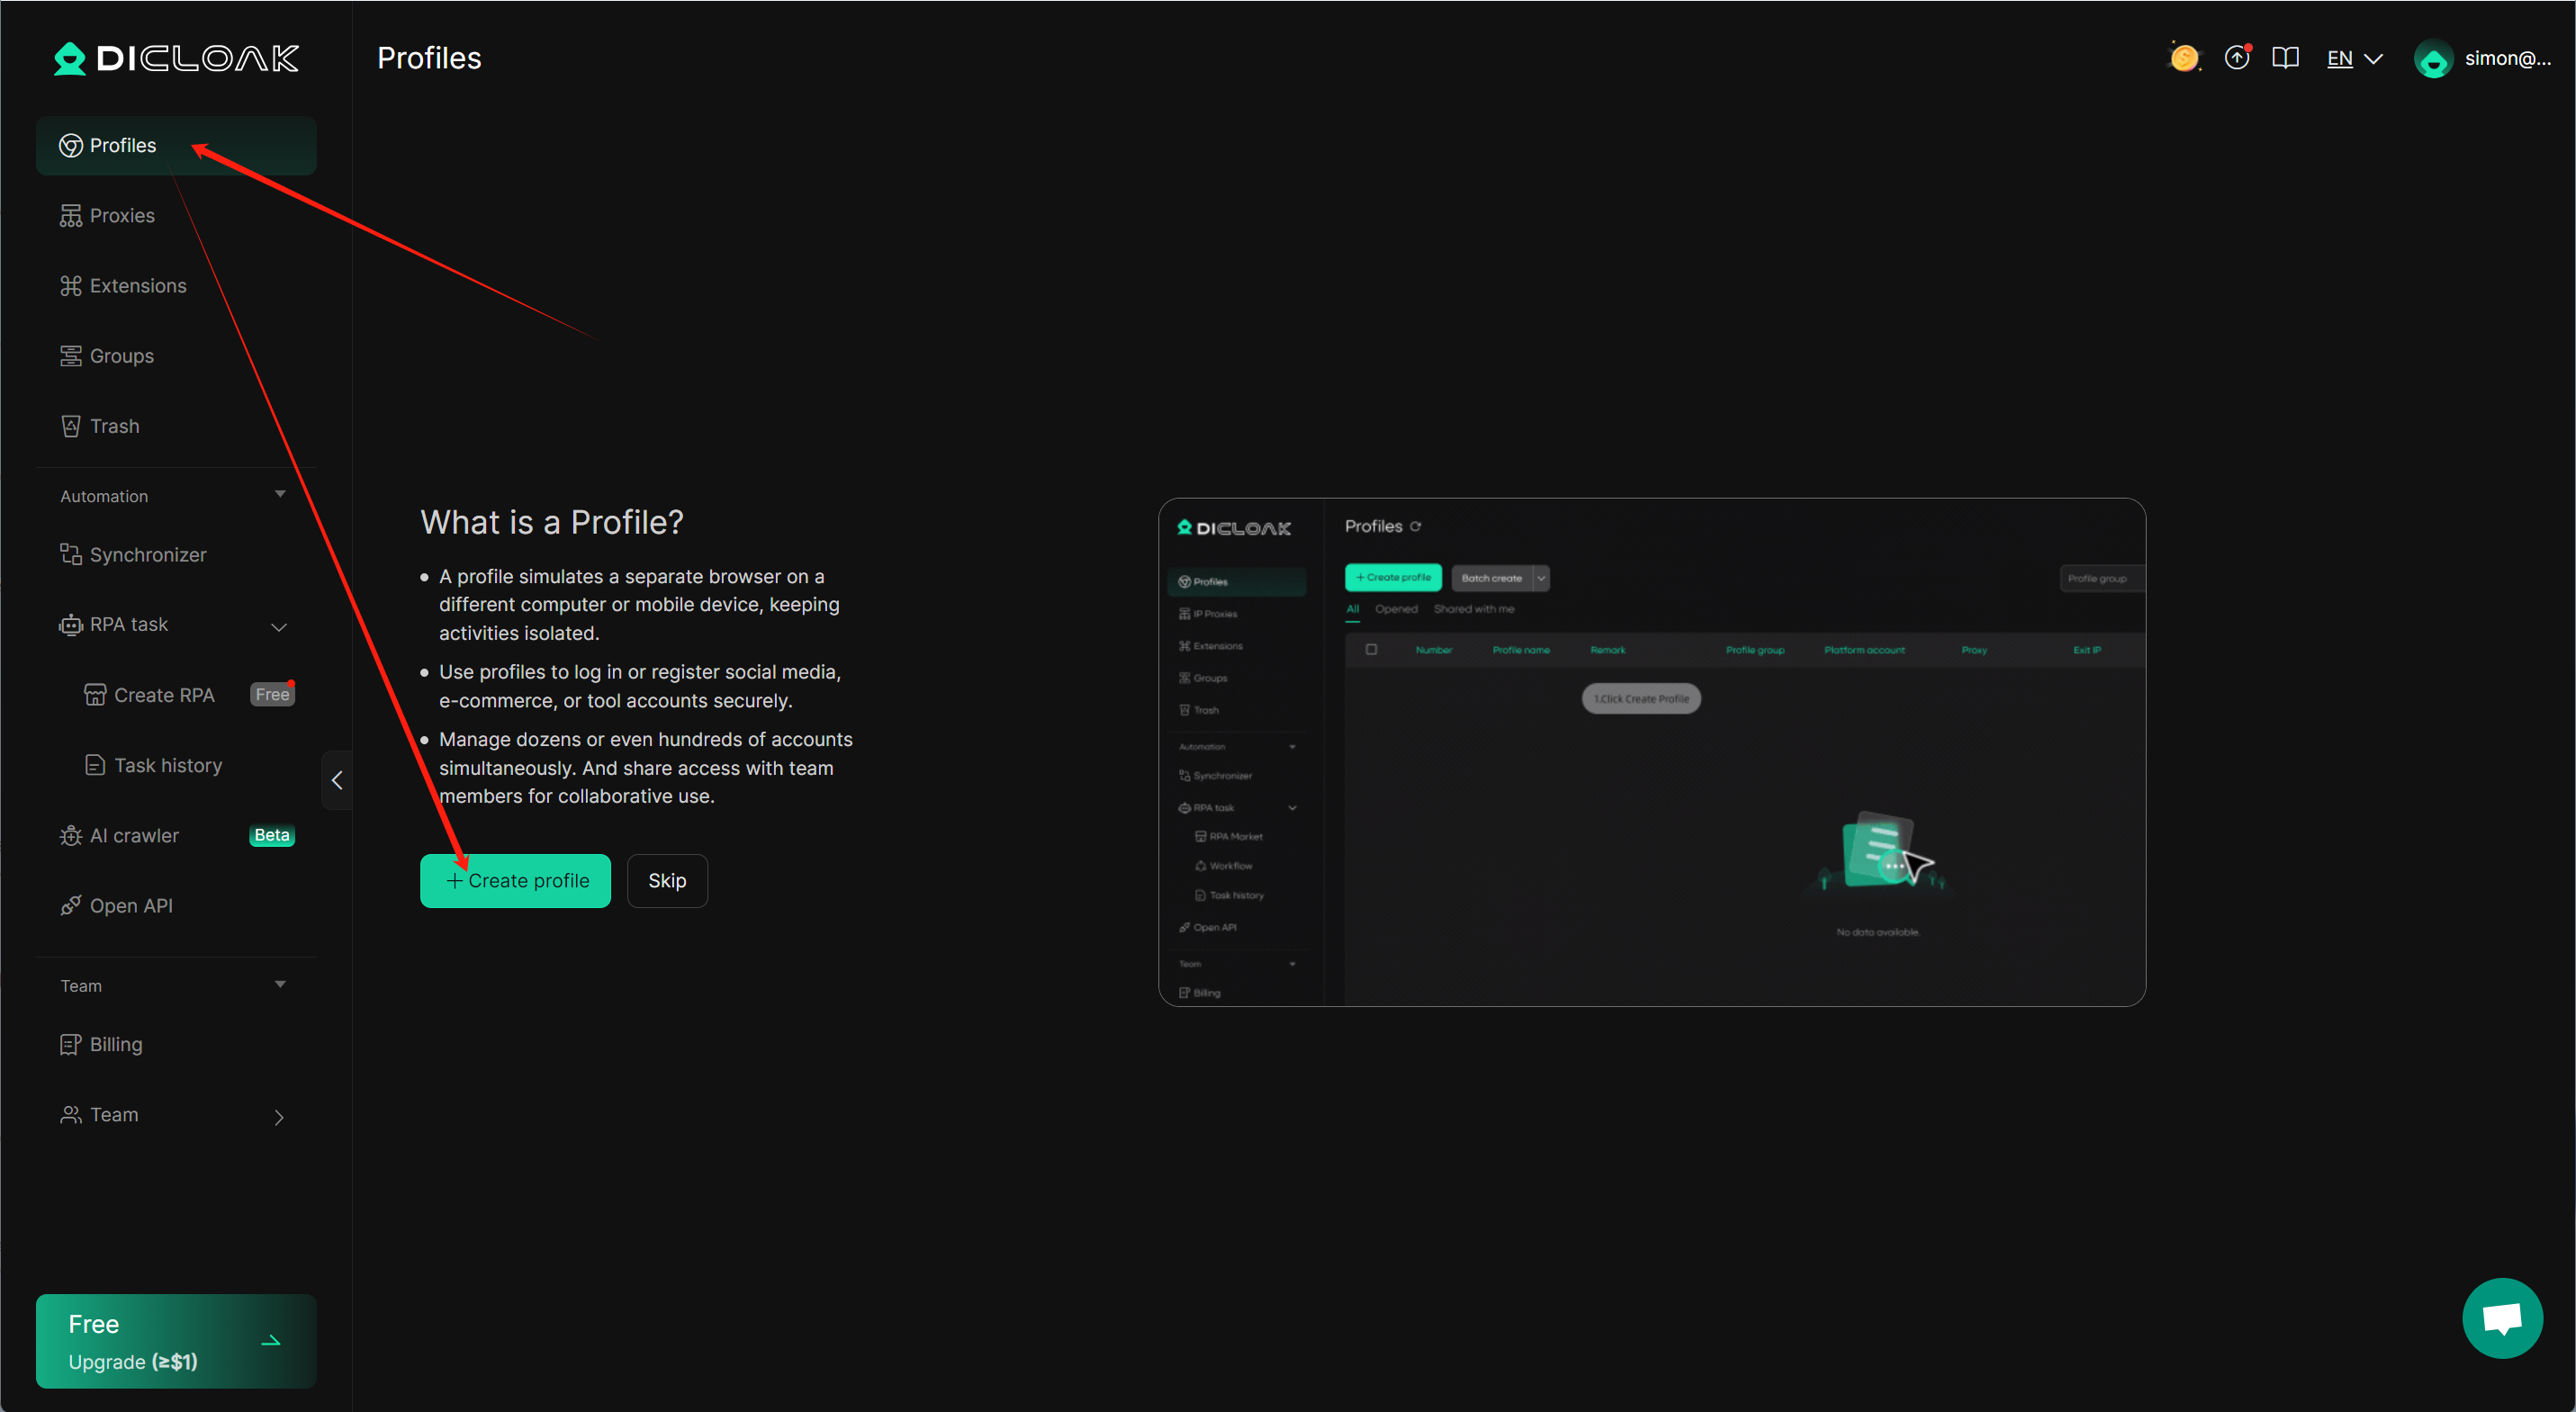
Easily manage multiple accounts with DICloak — avoiding blocks and password transfers through Protected Fingerprint, Shielded Teamwork, and Private Data Privacy.
1.Download DICloak, register an account (if you haven’t already), and log in.
Need help or want to stay updated on new features?
Join Dicloak’s official Telegram channel: https://t.me/DICloakBrowser_Official.
You’ll also find special deals and limited-time promo codes shared there from time to time.
2.Navigate to “Proxy Management” and import the proxies from QuarkIP into DICloak.
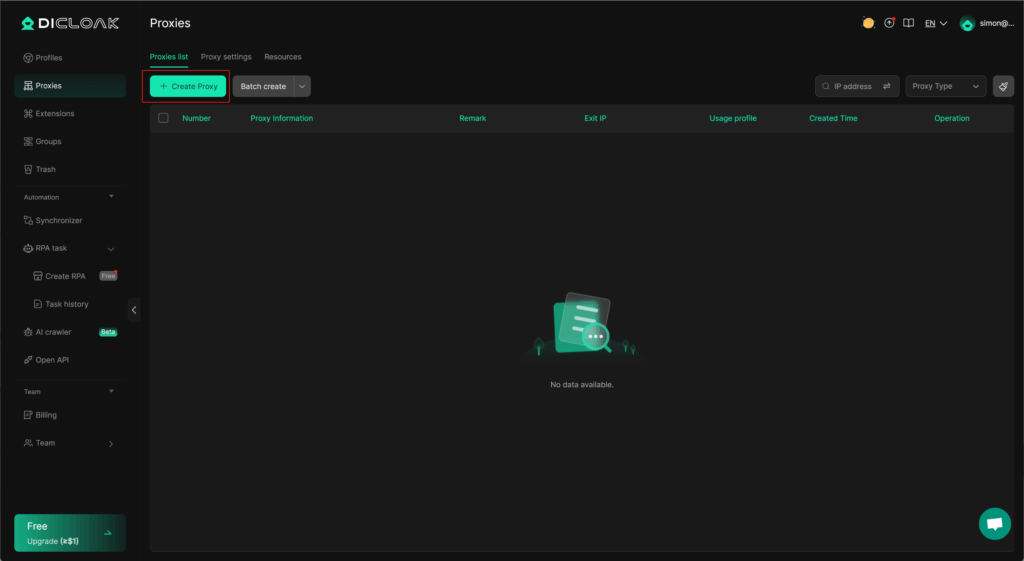
3.Click the “Create Proxy” button.
4.Once traffic allocation is complete, select your desired region and configure other settings, then click the ‘Extract’ button
- Country/Region:Select the proxy’s country. Choose “Global Mix” for random international rotation
- State (Optional):The proxy’s state/province. Leave blank for random rotation within the selected country
- City (Optional):The proxy’s city. Omit for broader location selection
- Route:Automatically selects optimal routes based on your region
- Rotation
- Sticky IP: Maintains the same IP for ~30 minutes
- Randomize IP: Changes IP with every request Choose based on your use case
- Protocol:Supports both SOCKS5 and HTTP
- Quantity:Select multiple proxies only if needed (e.g., for configuring multiple browser profiles). Otherwise, 1 is sufficient
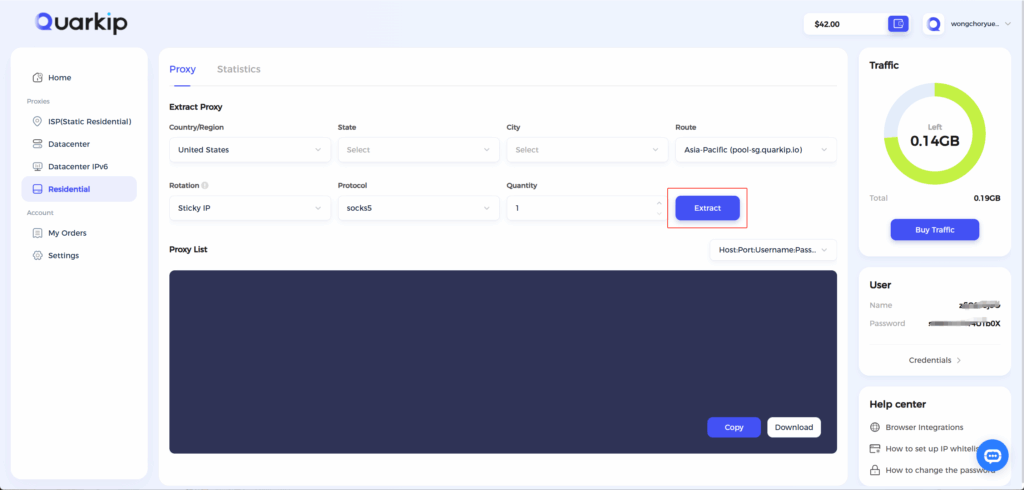
Note: Each field is separated by a colon (:). The account credential should be entered as a complete string – be sure to include all trailing parameters during import.
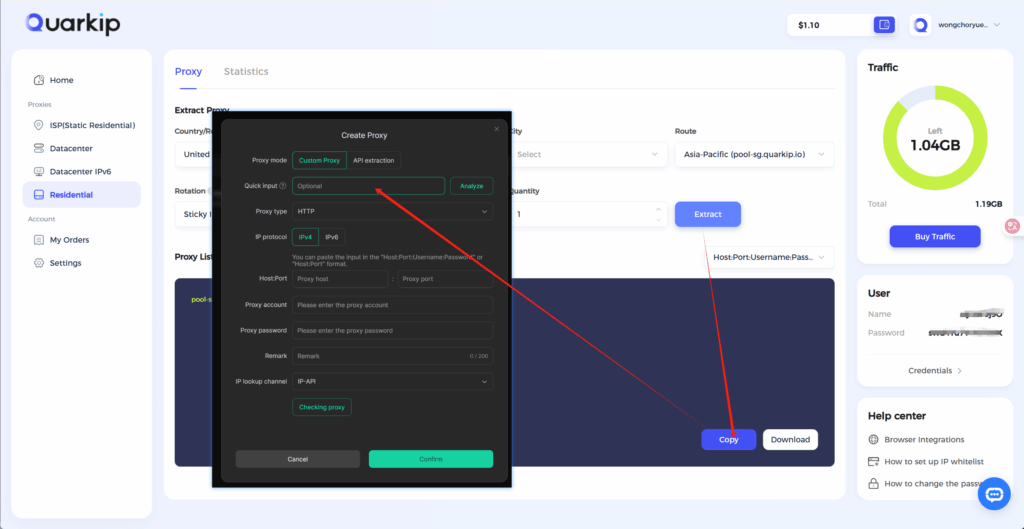
5.Copy the generated information into the input box, and make sure the protocols match,click the ‘’Analyze‘’ button
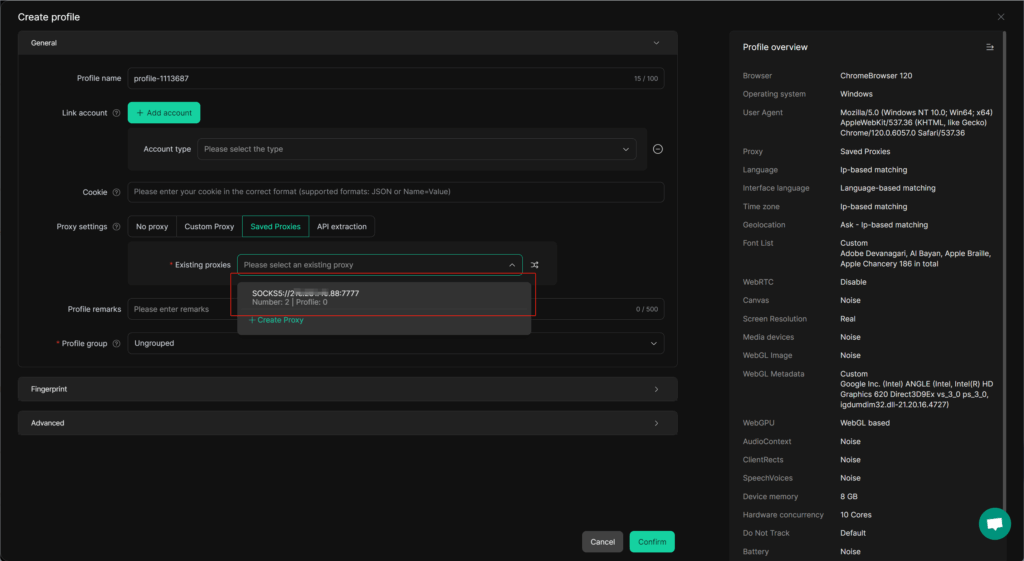
6.Once the proxy is verified, proceed to create a new browser profile; select the newly added QuarkIP proxy from the “Existing Proxies” list, complete the setup, and save to start using it.