Skip to content

HelpCenter

Login

Quick Start Guides

4
  • What is QuarkIP?
  • How to Sign Up for QuarkIP?
  • How to Top-Up?
  • How to Purchase a Proxy?

FAQ

9
  • Which countries’ proxies do we offer?
  • What happens if I don’t use all my traffic?
  • Can I extend the plan of my proxy service?
  • How Can I Contact You?
  • Are the proxies I buy from QuarkIP exclusive?
  • How Fast Are QuarkIP Proxies?
  • What’s the Difference Between Datacenter Proxies and Datacenter IPv6 Proxies?
  • What’s the Difference Between ISP and Residential Proxies?
  • What Kind of Free Trial Plans Do You Offer?

Billing and Pricing

6
  • Do you offer refunds for your proxies?
  • Why does my purchased proxy show as “In progress”?
  • Where can I get an invoice for my order?
  • Does QuarkIP offer discounts?
  • Can I cancel my order at any time?
  • What payment methods does QuarkIP support?

Residential Proxies

7
  • How to Claim Your 200MB Free Trial
  • Where can I view my traffic usage?
  • How to Whitelist an IP Address
  • Can I change my password?
  • Will the traffic I purchase expire?
  • How to Use Residential Proxies
  • How to Purchase Residential Proxies

Datacenter Proxies

7
  • How do I purchase datacenter proxies?
  • How to use datacenter proxies?
  • Can I use the same proxy on multiple devices at the same time?
  • How can I export all Datacenter proxies?
  • How to change my proxy protocol?
  • Do datacenter proxies support refunds?
  • How can I extend my datacenter proxy plan?

ISP Proxies

7
  • How do I purchase ISP proxies?
  • How to use ISP proxies?
  • How to change my proxy protocol?
  • How can I export all ISP proxies?
  • Can I get a refund for ISP proxies?
  • Can I use a ISP proxy on multiple devices at the same time?
  • How can I extend the duration of my static residential proxy plan?

Datacenter IPv6 Proxies

7
  • How do I purchase datacenter IPv6 proxies?
  • How to use datacenter IPv6 proxies?
  • Can I use the same proxy on multiple devices at the same time?
  • How to export all Datacenter IPv6 proxy data
  • How do I change the proxy protocol?
  • Is the Datacenter IPv6 proxy eligible for a refund?
  • How to Extend Your Datacenter IPv6 Proxy Plan

Static Proxy

12
  • How to Set Up a Static Proxy on Hidemium
  • How to Set Up a Static Proxy on Android
  • How to Set Up a Static Proxy on IOS
  • How to use QuarkIP Static Proxy with Safari
  • How to use QuarkIP Static Proxy with MoreLogin
  • How to Use QuarkIP Static Proxy with HubStudio
  • How to Use QuarkIP Proxy with Firefox
  • How to Use QuarkIP Proxy with Chrome
  • How to Use QuarkIP Proxy with Adspower
  • How to Use QuarkIP Proxy with Shadowrocket
  • How to Use QuarkIP Proxy with Dolphin
  • How to Set Up a Proxy on V2Ray

Residential Proxy

11
  • How to Set Up a Residential Proxy on Hidemium
  • How to Set Up a Residential Proxy on Android
  • How to Set Up a Residential Proxy on IOS
  • How to Set Up a Residential Proxy on V2Ray
  • How to Use QuarkIP Residential Proxy with HubStudio
  • How to Use QuarkIP Residential Proxy with Safari
  • How to Use QuarkIP Residential Proxy with MoreLogin
  • How to Use QuarkIP Residential Proxy with Dolphin
  • How to Use QuarkIP Residential Proxy with Adspower
  • How to Use QuarkIP Residential Proxy with Chrome
  • How to Use QuarkIP Residential Proxy with Firefox
View Categories
  • HelpCenter
  • Integration Guides
  • Residential Proxy
  • How to Set Up a Residential Proxy on V2Ray

How to Set Up a Residential Proxy on V2Ray

V2Ray is a next-generation proxy platform built to help users bypass internet censorship and protect online privacy. With support for multiple protocols, customizable routing, and traffic obfuscation, V2Ray offers a flexible and secure solution for accessing the open internet—fast, reliably, and without compromise.

In this tutorial, we’ll walk you through how to set up V2Ray on an Android device

1.Download and install V2rayNG from Google Play

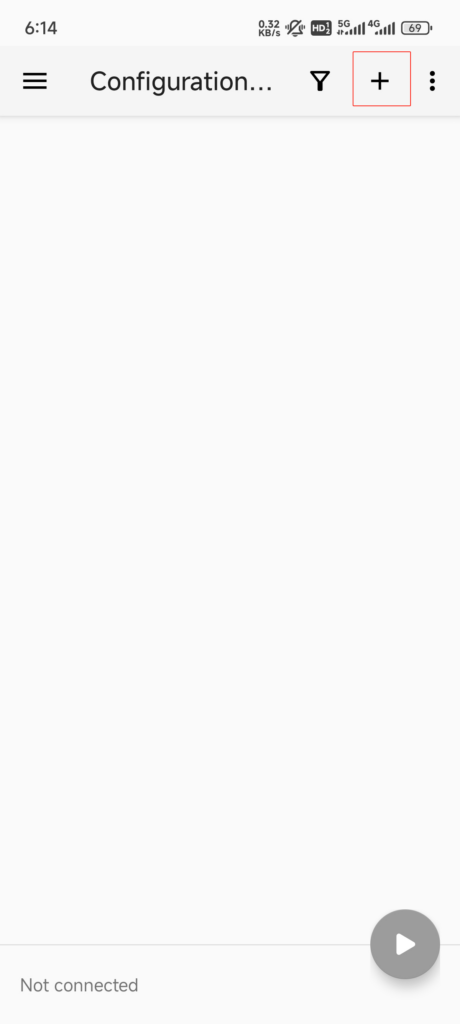
2.After launching V2rayNG, tap the “+” icon in the top right corner

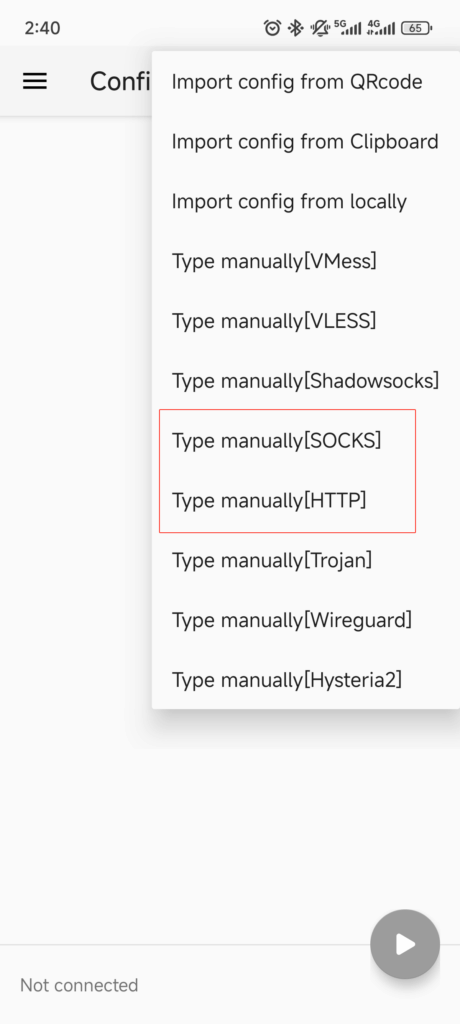
3.Select either “SOCKS” or “HTTP” to import QuarkIP’s proxy IP. Then, return to QuarkIP to generate the corresponding proxy details

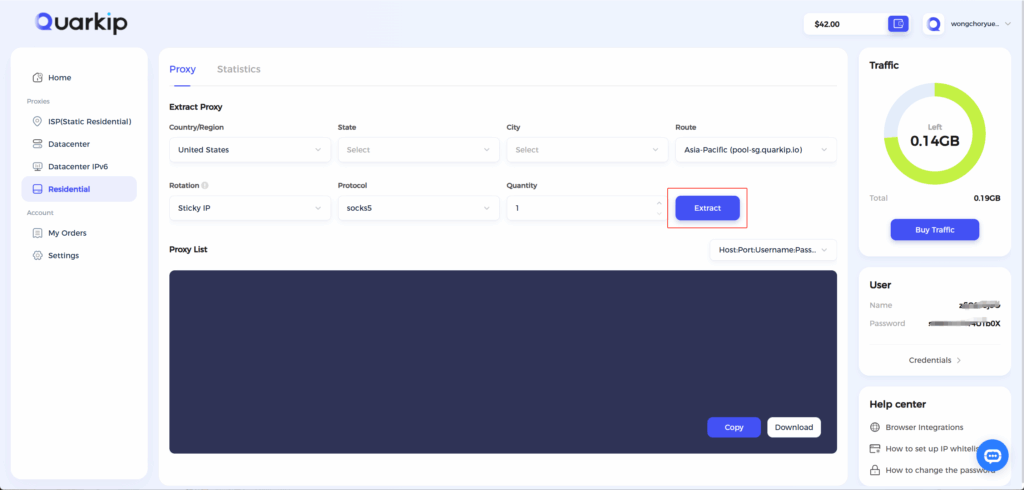
4.Once traffic allocation is complete, select your desired region and configure other settings, then click the ‘Extract’ button

  • Country/Region:Select the proxy’s country. Choose “Global Mix” for random international rotation
  • State (Optional):The proxy’s state/province. Leave blank for random rotation within the selected country
  • City (Optional):The proxy’s city. Omit for broader location selection
  • Route:Automatically selects optimal routes based on your region
  • Rotation
    • Sticky IP:​​ Maintains the same IP for ~30 minutes
    • ​​Randomize IP:​​ Changes IP with every request Choose based on your use case
  • Protocol:Supports both SOCKS5 and HTTP
  • Quantity:Select multiple proxies only if needed (e.g., for configuring multiple browser profiles). Otherwise, 1 is sufficient

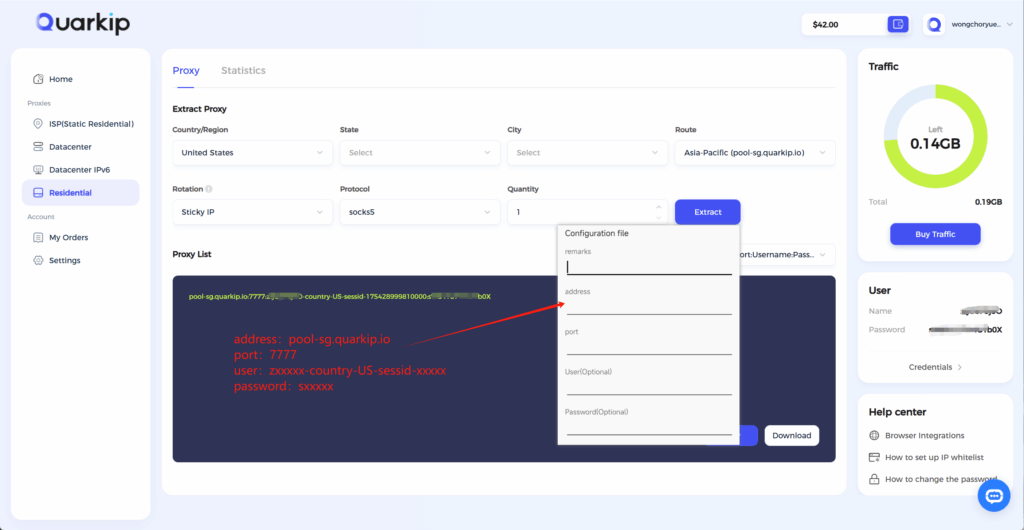
Note: Each field is separated by a colon (:). The account credential should be entered as a complete string – be sure to include all trailing parameters during import.

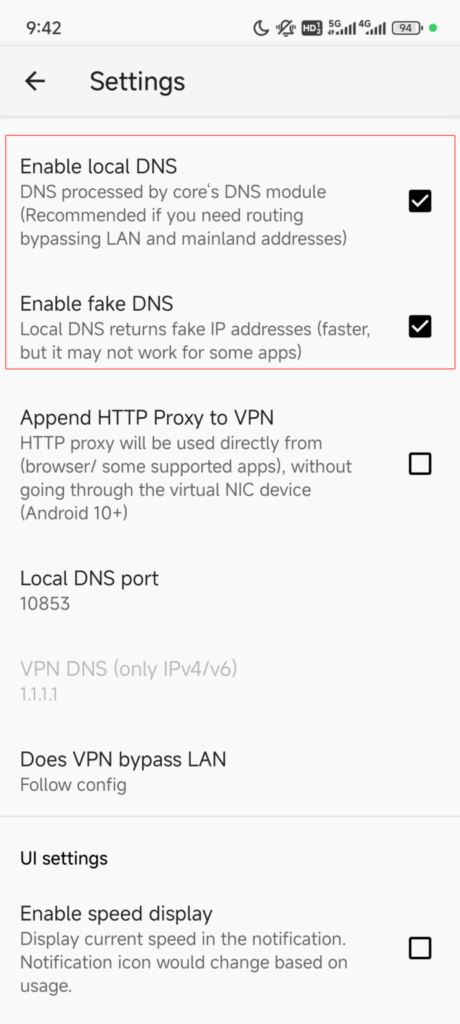
5.After saving, click the location shown in the image to enable both “Enable local DNS” and “Enable fake DNS”

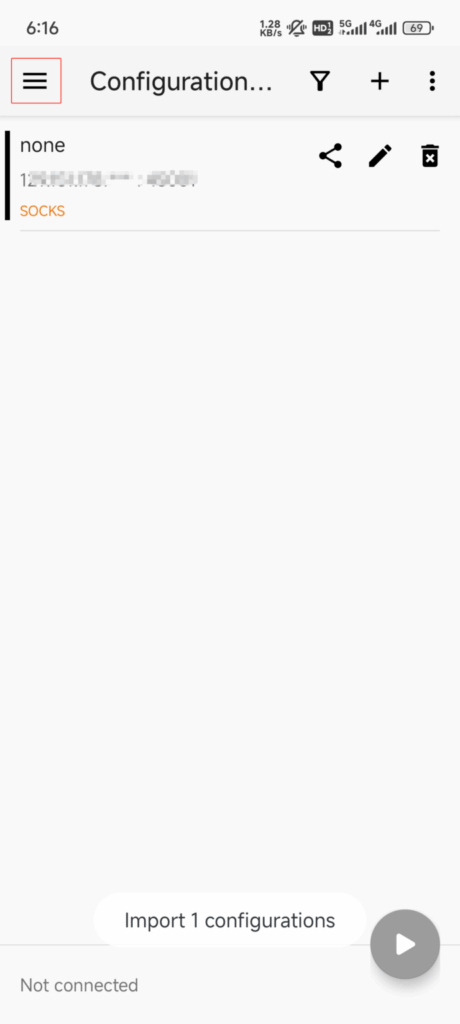
6.After enabling, go back and select the proxy you just added, then turn on the connection to start using it

Share This Article :
  • Facebook
  • X
  • LinkedIn
  • Pinterest
How to Set Up a Residential Proxy on IOS