HubStudio is a cloud-based platform specializing in browser fingerprint management and secure multi-account logins. It is designed for users who need to manage multiple accounts or perform large-scale data collection, such as in cross-border e-commerce, social media operations, advertising campaigns, or web scraping.
1.Go to the HubStudio website to download the client. If you haven’t registered yet, please sign up first.
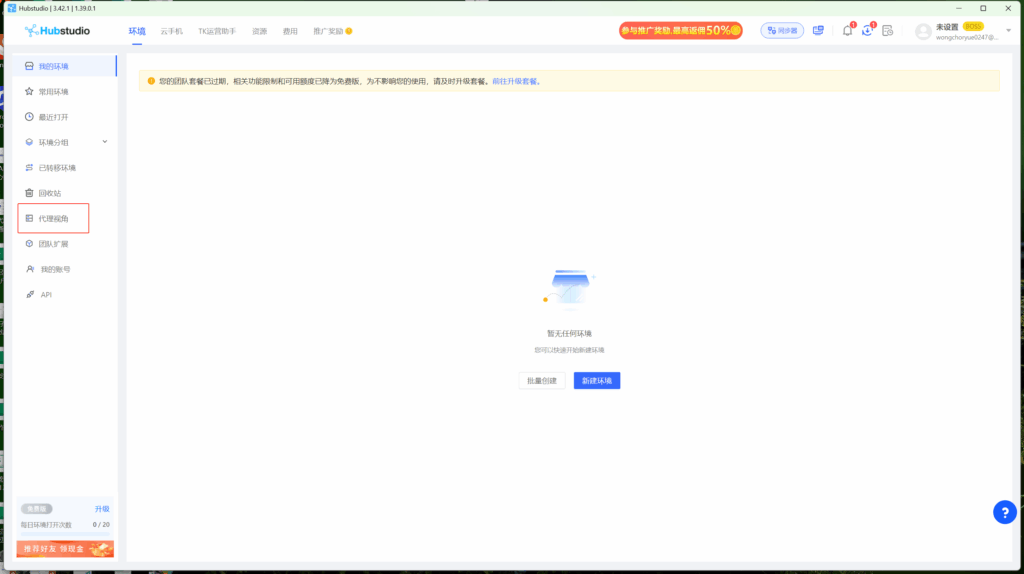
2.Log in to the homepage and navigate to the “Proxy View” page.
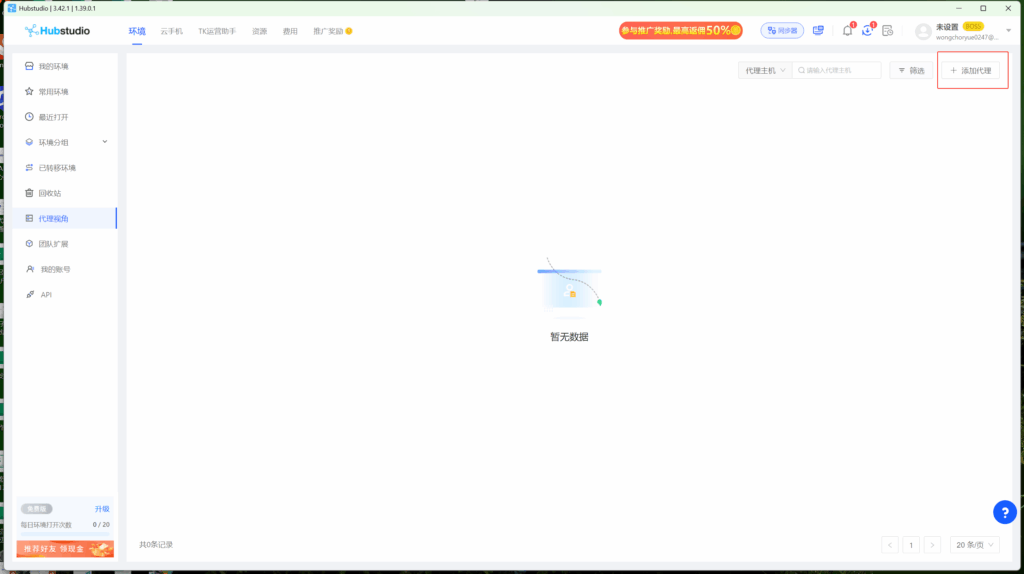
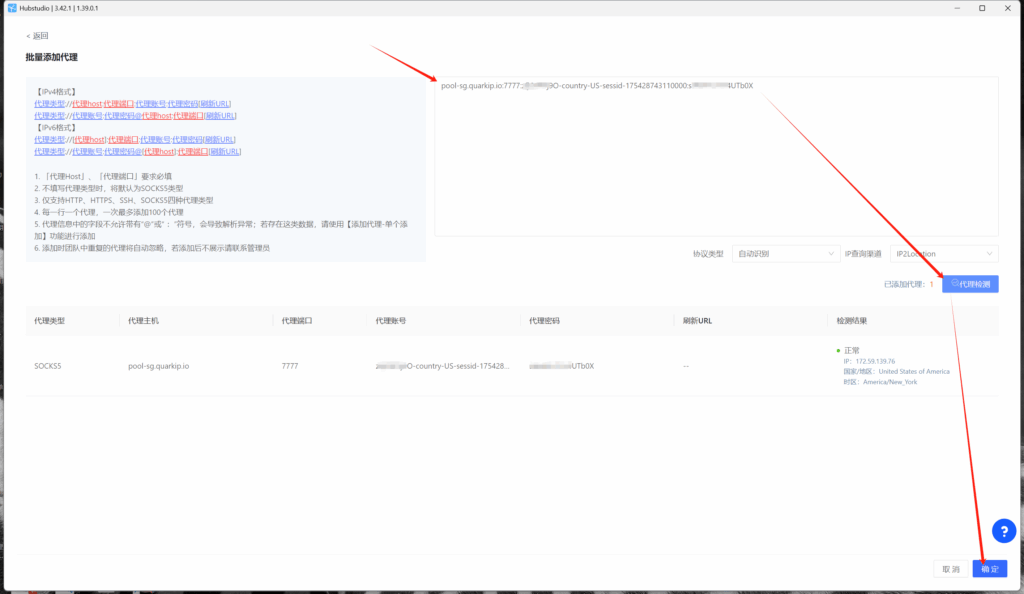
3.On the Proxy View page, click the “Add Proxy” button.Use ‘Batch Add’.Next, return to Quark, generate the proxy info, and paste it into the input box.
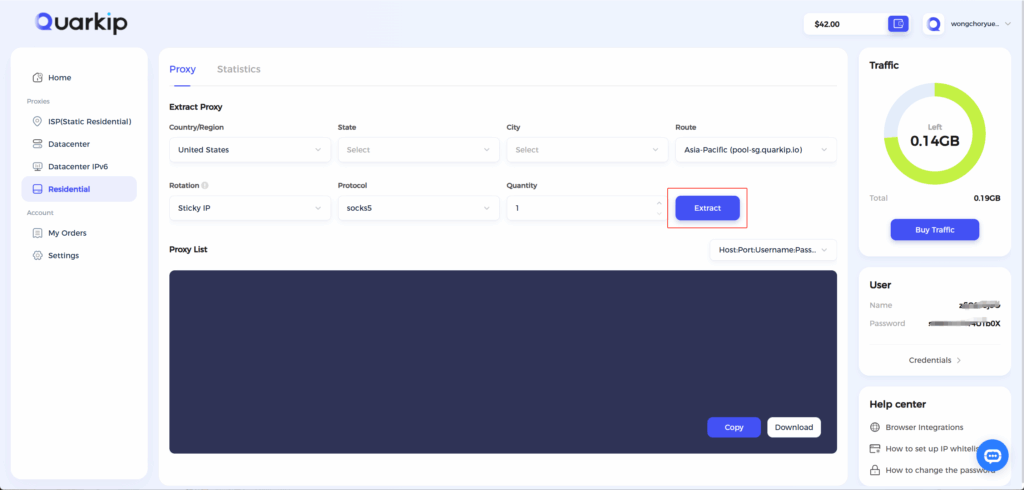
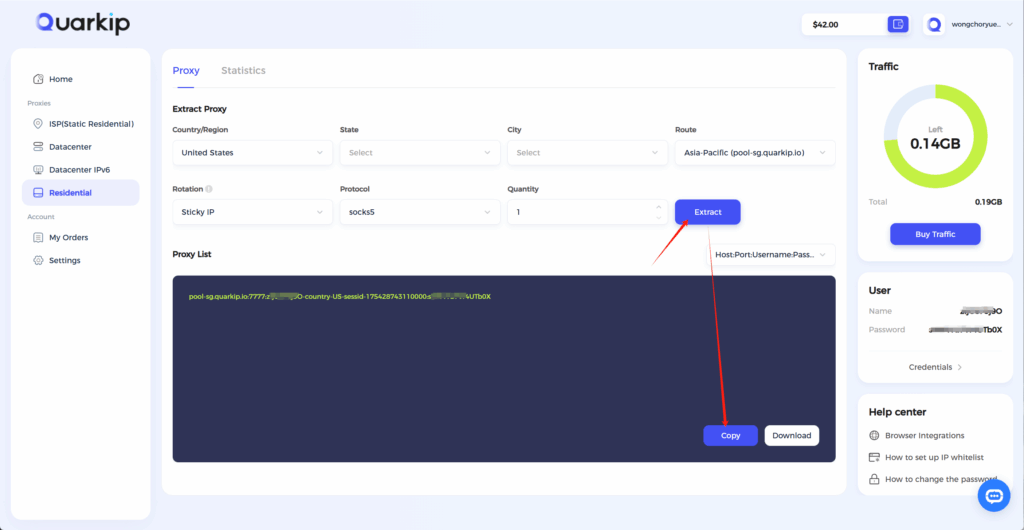
4.Once traffic allocation is complete, select your desired region and configure other settings, then click the ‘Extract’ button
- Country/Region:Select the proxy’s country. Choose “Global Mix” for random international rotation
- State (Optional):The proxy’s state/province. Leave blank for random rotation within the selected country
- City (Optional):The proxy’s city. Omit for broader location selection
- Route:Automatically selects optimal routes based on your region
- Rotation
- Sticky IP: Maintains the same IP for ~30 minutes
- Randomize IP: Changes IP with every request Choose based on your use case
- Protocol:Supports both SOCKS5 and HTTP
- Quantity:Select multiple proxies only if needed (e.g., for configuring multiple browser profiles). Otherwise, 1 is sufficient
Note: Each field is separated by a colon (:). The account credential should be entered as a complete string – be sure to include all trailing parameters during import.
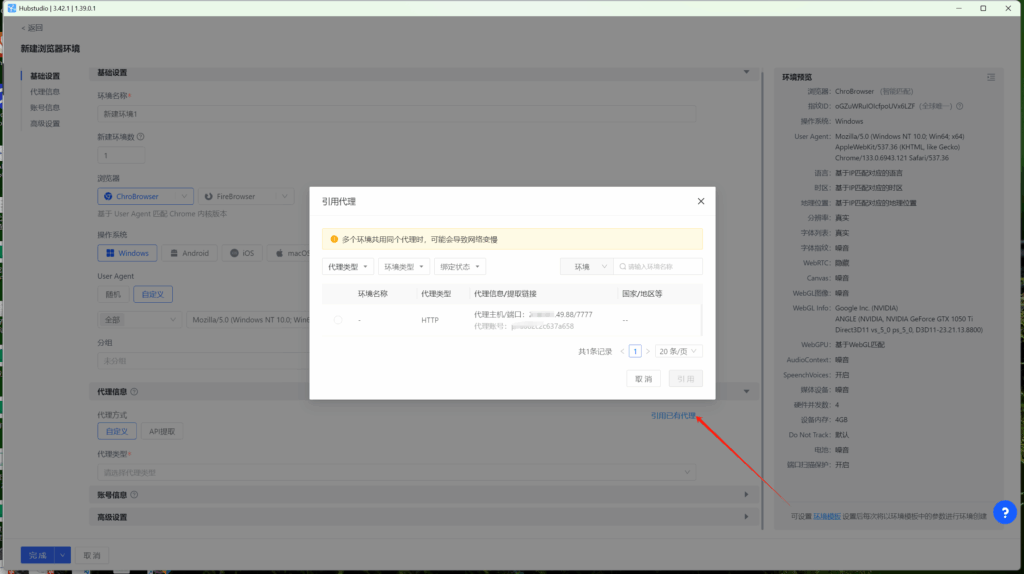
5.After the information is generated, click the ‘Copy’ button and paste it into Hubstudio,Verify the IP location is correct, then save it.
6.Return to HubStudio’s environment settings. You can either create a new environment or modify an existing one.In the proxy settings, select the QuarkIP ISP proxy you just added.