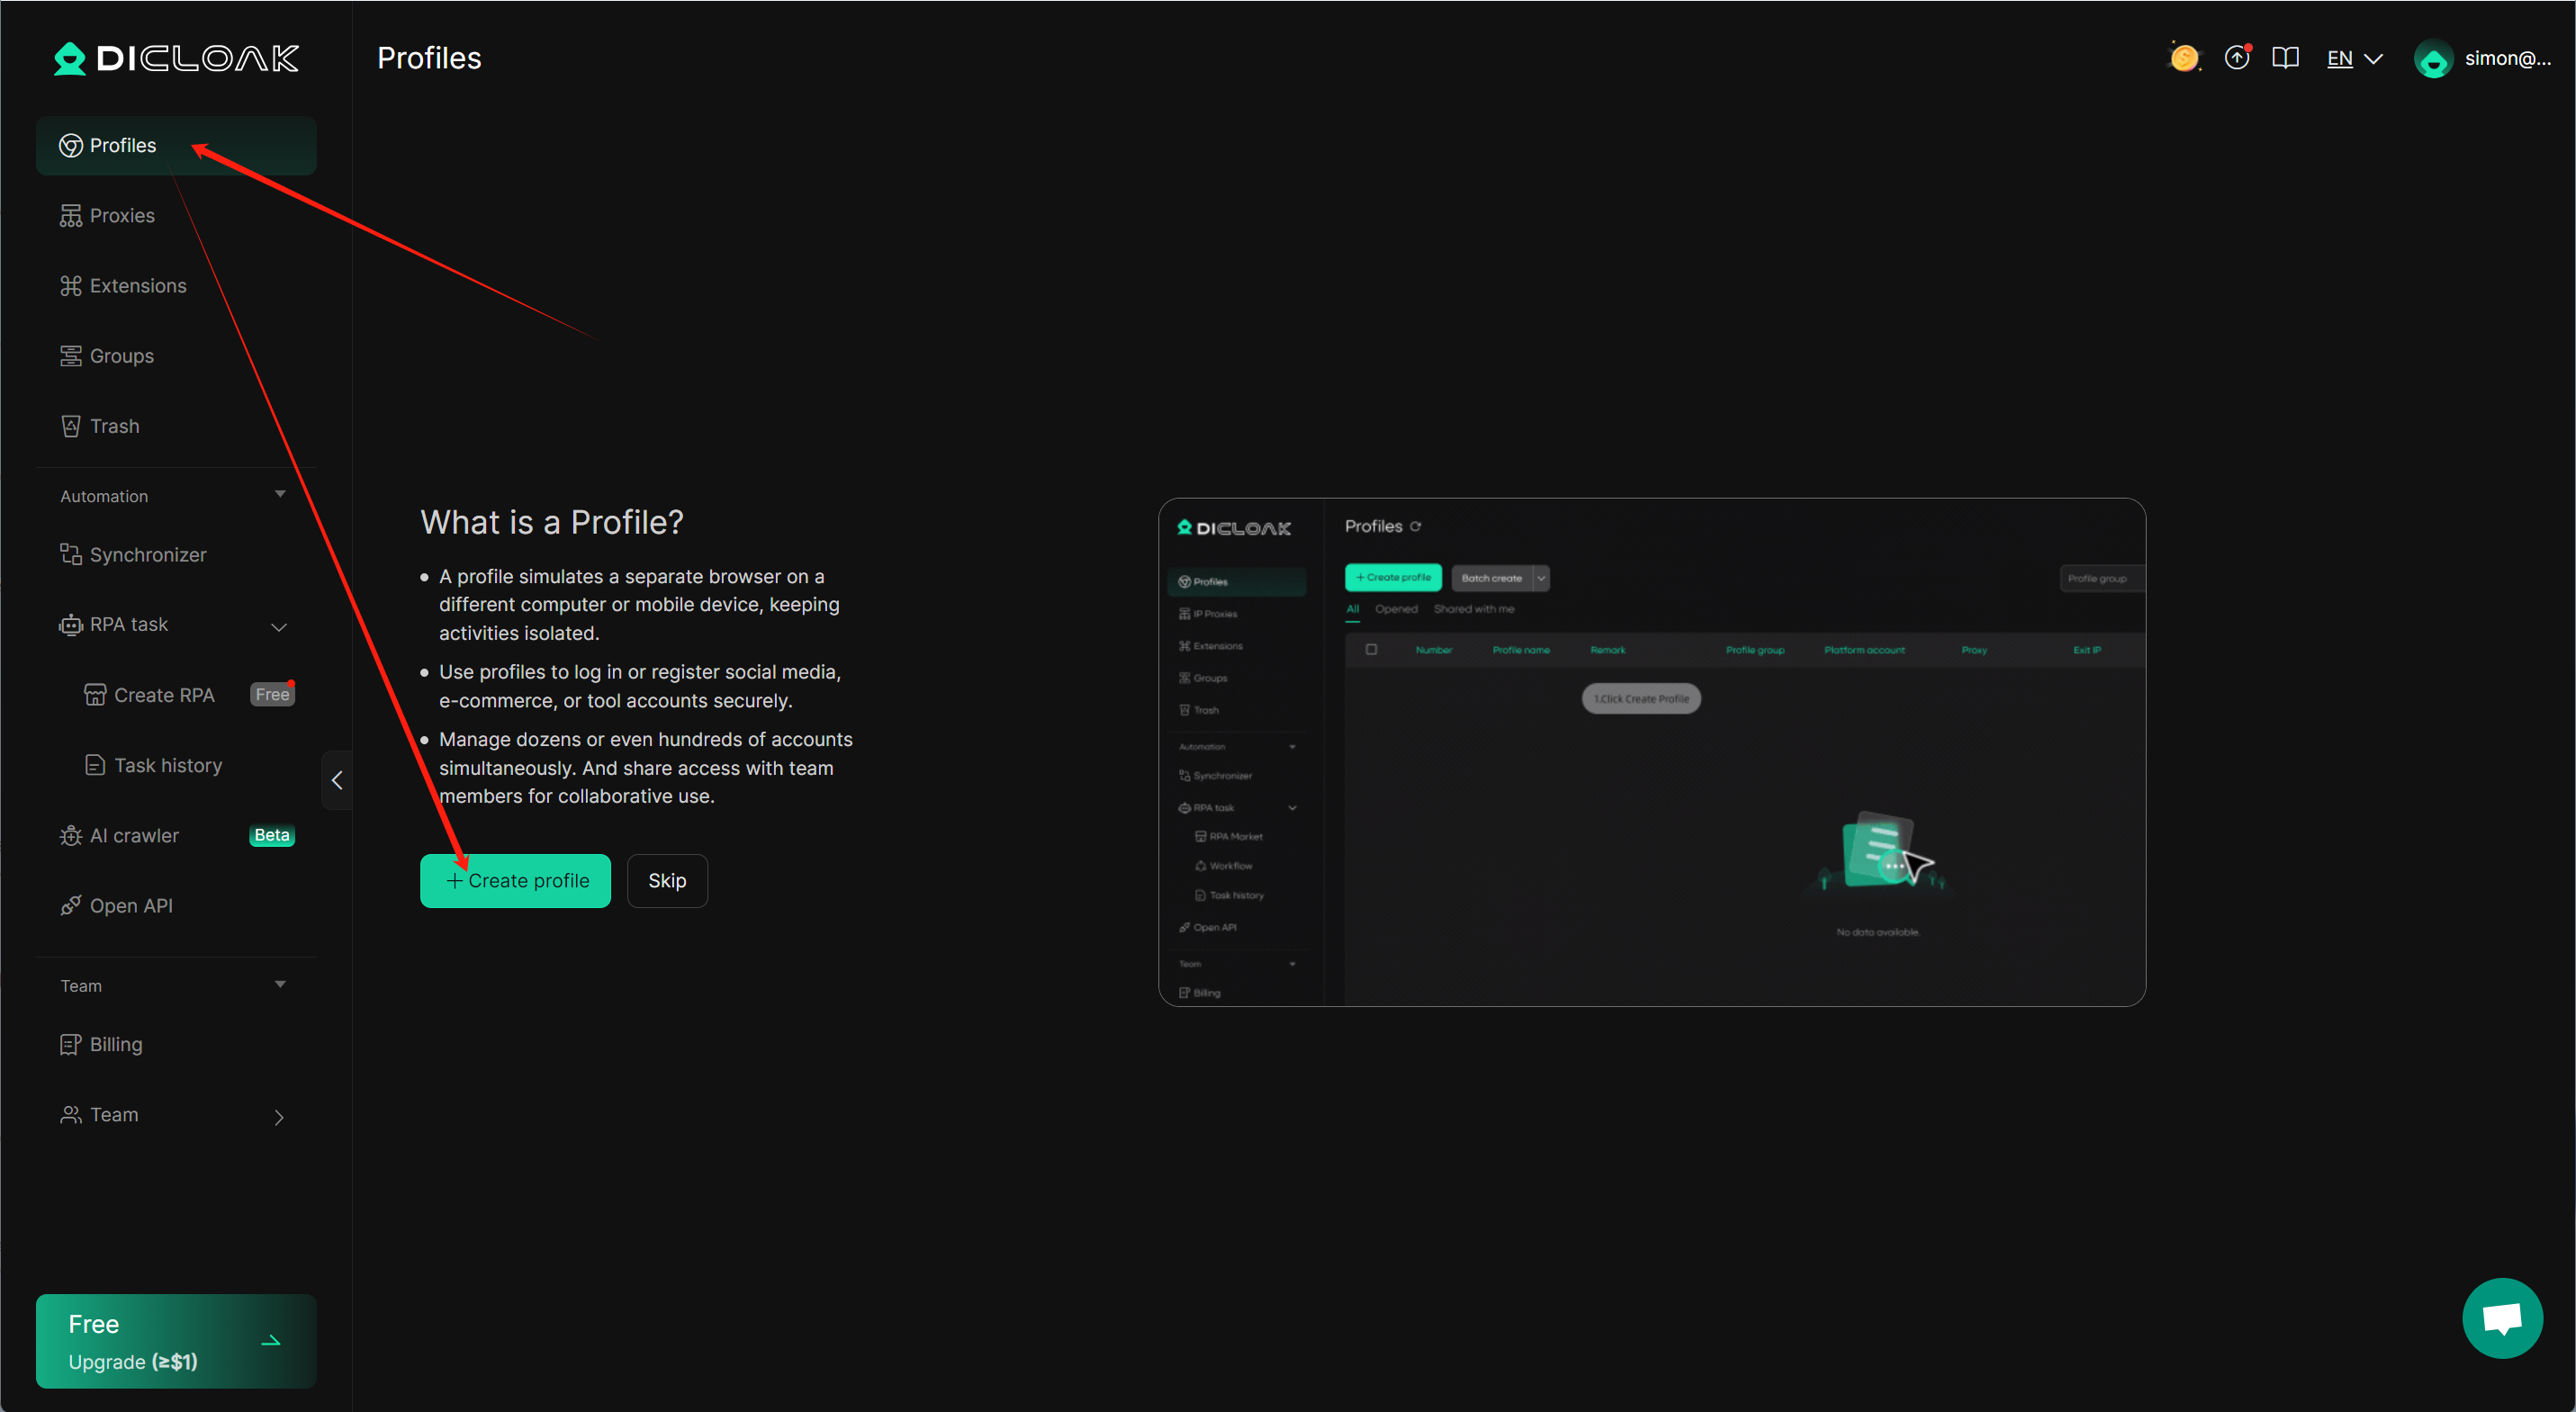
Easily manage multiple accounts with DICloak — avoiding blocks and password transfers through Protected Fingerprint, Shielded Teamwork, and Private Data Privacy.
1.Download DICloak, register an account (if you haven’t already), and log in.
Need help or want to stay updated on new features?
Join Dicloak’s official Telegram channel: https://t.me/DICloakBrowser_Official.
You’ll also find special deals and limited-time promo codes shared there from time to time.
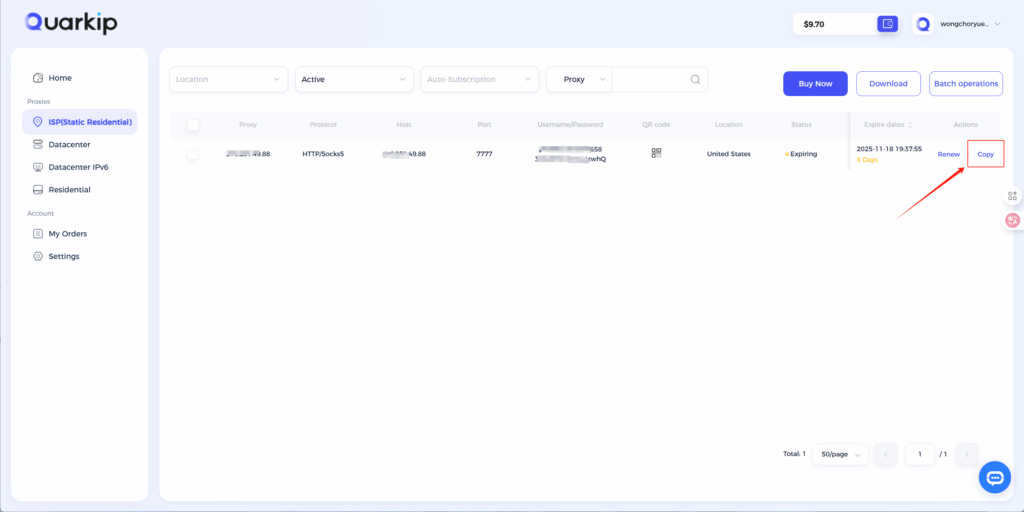
2.Navigate to “Proxy Management” and import the proxies from QuarkIP into DICloak.
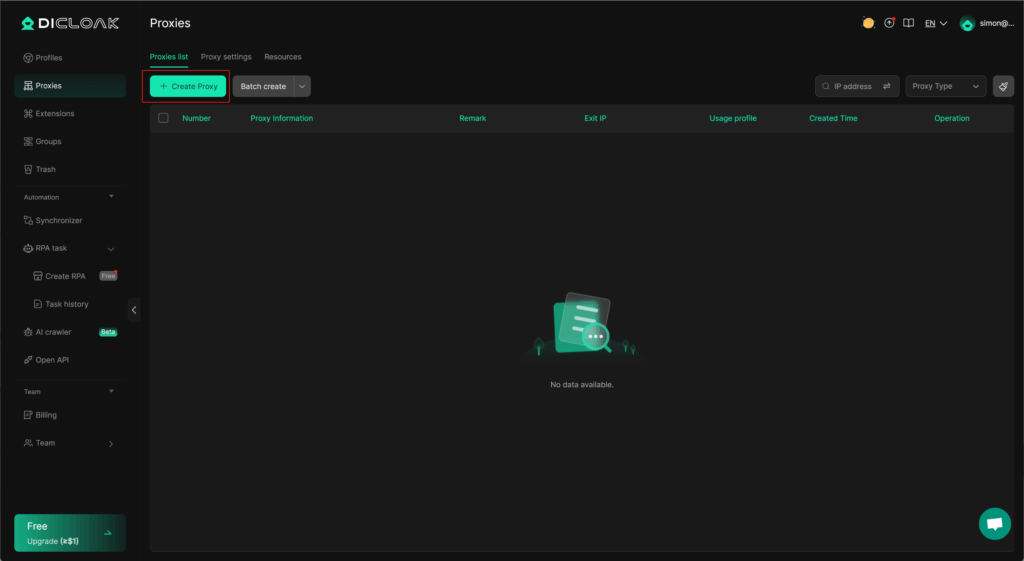
3.Click the “Create Proxy” button.
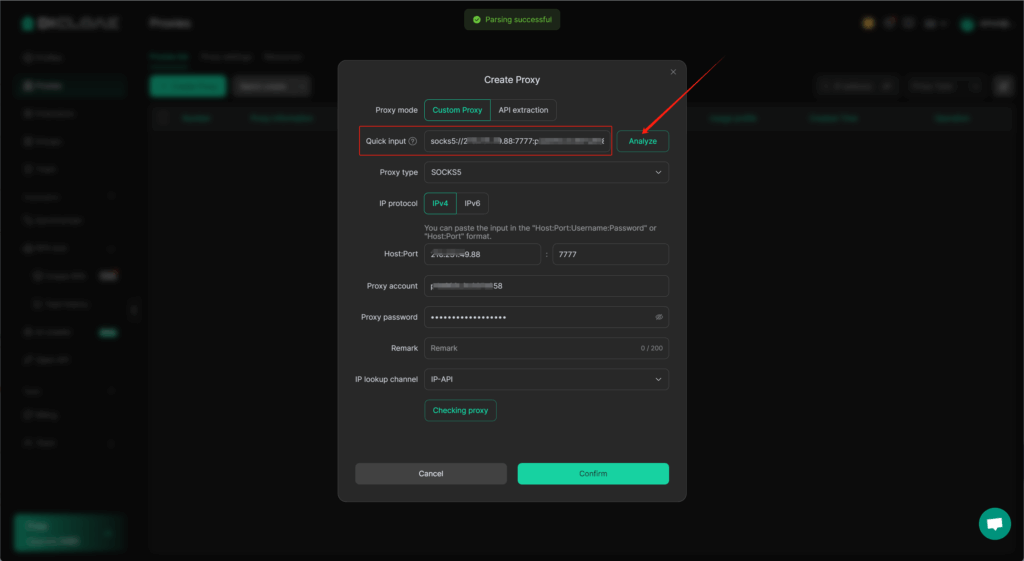
4.Using QuarkIP’s United States ISP proxies as an example, enter the corresponding proxy information into DICloak based on the provided labels.
- After purchasing a proxy, it takes 2-3 minutes for the allocation to complete. During this time, we verify the payment status and assign the proxy. The proxy status will show as ‘Allocating’ while this process is underway
- Unlike other proxy products, you can freely select HTTP or Socks5 protocols without having to change the port number.
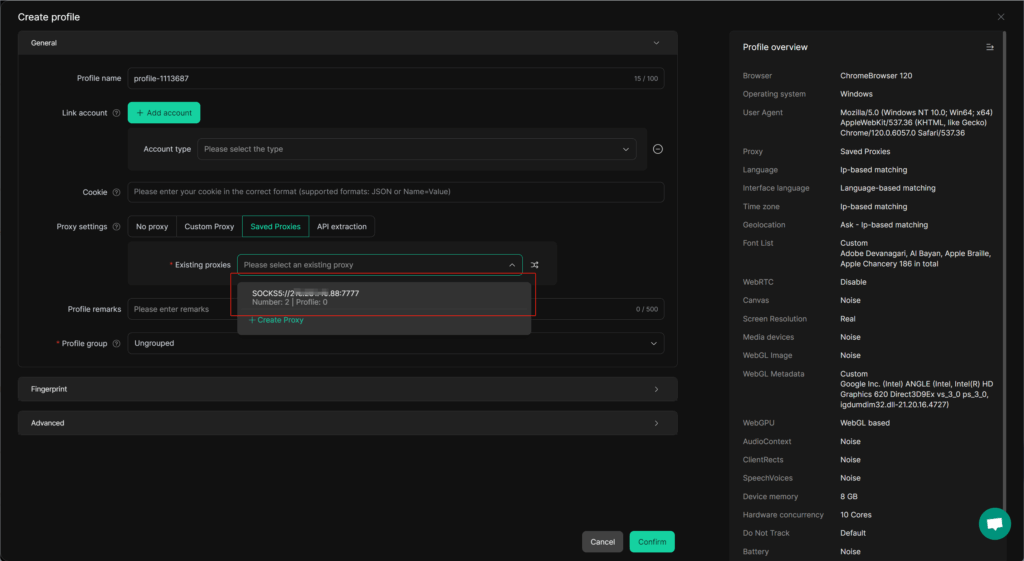
4.Once the proxy is verified, proceed to create a new browser profile; select the newly added QuarkIP proxy from the “Existing Proxies” list, complete the setup, and save to start using it.